My Week in Checklists

My list on Monday and what I accomplished:

  • Finish and mail unit quilt to Monique
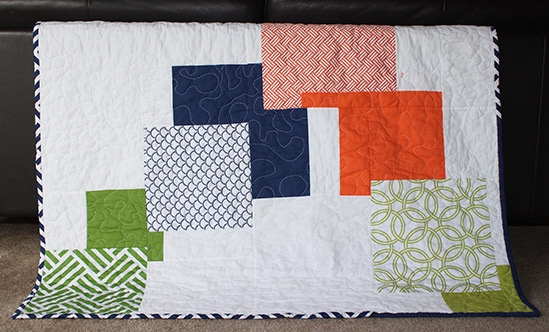
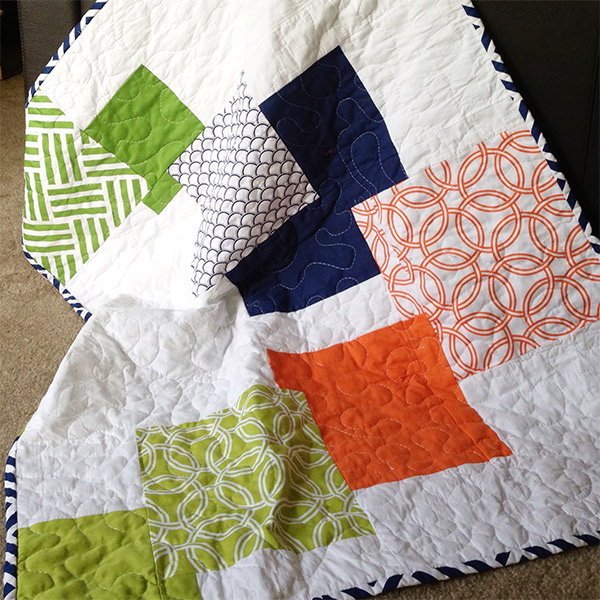
  • Make quilt for baby shower this weekend
  • Make cake rolls for baby shower this weekend
  • Get Paul’s birthday box together
  • Do last of the Thanksgiving shopping
  • Start two Christmas quilts
  • Go to lunch with Karla
  • Make giant wreath with Sue

I got a lot done.  I’ll make the rolls tomorrow so they are warm for the shower.  I have about half of Paul’s box together, I’ll finish that this weekend.  Whether or not the wreath is going to get done is still in question.  We’ll see.

Done Gif

Besides the baby shower, I think I will take my girls to see Catching Fire.

One more week down and one more week closer to Paul’s return.

Liz’s Quilt

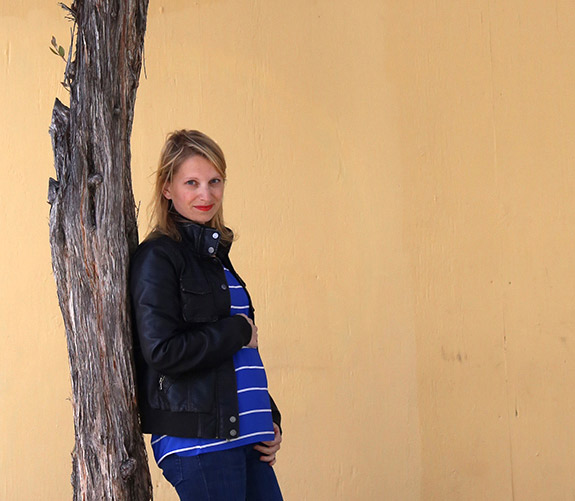
I can’t tell you how happy our family was when we found out that my sister in law Liz and brother Jared were expecting another baby.  It had been a long time in coming and it was a joyful, tearful, happy day.  Even now I can’t think about it without getting emotional.
liz-preg

Planning

Of course I was going to make my expected little niece a quilt.   When Liz and I talked about different quilts she might want for the nursery,  she remembered that she had an old quilt that she wanted to repurpose.  She hadn’t seen it for a while and she wasn’t sure if she could even track it down and if she did track it down, she wasn’t sure if it would even be useable.   She found it though (yea!) and sent it to me.

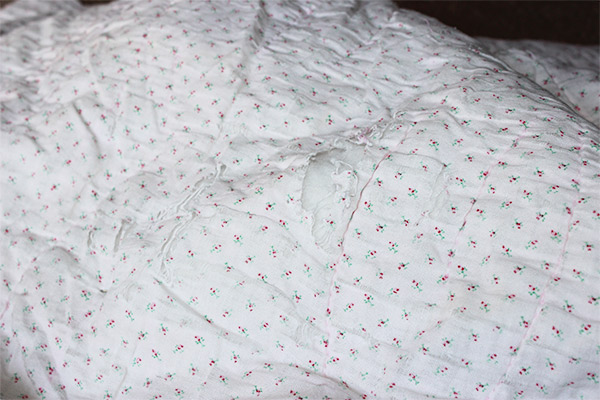
It was large for a baby quilt, about 55′ x 55′, and has a faded pale pink, almost white back ground with a tiny pink rosebud print.  So so sweet.  It had also been hand quilted, I love that.

Before it had come into her possession this quilt had obviously been well loved and well used.  There is something so lovely about that.  Knowing that something was loved or maybe a comfort to some little girl, now all grown up.
Liz's-quilt

Prep

The blanket was not in good shape.  The edge of one side was torn and there were spots all over the quilt, large and small, where the fabric was worn through or very thin.  There were also quite a few brown, milk stains.

The first order of business was to get rid of the stains.  Nothing worked very well until I soaked it in Oxyclean.  And for the darker spots I had to concentrate the powder directly on the spot.  It worked.

Getting stuck

So now I had a clean blanket and I had seen the larger holes but when I looked at it closely, there were little tiny holes were everywhere.  If they weren’t on one side, they were on the other.  I didn’t see how I was going to get even a baby sized quilt out of it.

I thought my only choice was to cut it into useable pieces and piece it with other fabrics.  That bummed me out.  It would be almost impossible to preserve the hand quilting and I wasn’t sure how this old fabric would look and feel with new fabric.

There was one area of the quilt that only had a few small holes, and holes are holes, but then . . .

Light bulb!

I thought about appliqué!  I could appliqué small patches over the little holes!

Once I thought of that, it only took a few hours to finish.  I cut the piece, put a binding of white on it and then appliquéd three little hearts over the holes.  Below is my Instagram finishing up one of the appliqués.

Untitled-4

This is the first quilt I’ve ever repurposed and although it was a challenge, I loved doing it and am so happy with the final product.

The story doesn’t end there.

Just the other day I got this text from Liz.

Liz: Just found out that old blanket? My great grandmother quilted it for my mother when she was a little girl. How sweet is that???  So glad we were able to revive it!!!

Me: That is so wonderful! I thought it was a thrift store find!

Liz: So it will be made by our daughter’s great great grandma (who was married to Henry Call, our Henry’s  namesake)

Me: I’m glad I saved the quilting and didn’t pull it out.  Hand quilted by your great grandmother.  Her very own stitches.  It’s making me cry.

I feel privileged that I was able to be a part of this sweet story and can’t wait to get my hands on my little niece.

Quilt Rule #7

Use Texture

This one is more of a tip than a rule.  Quilting fabric is wonderful, of course, but consider shaking things up and throw some textured fabrics into your next quilt.

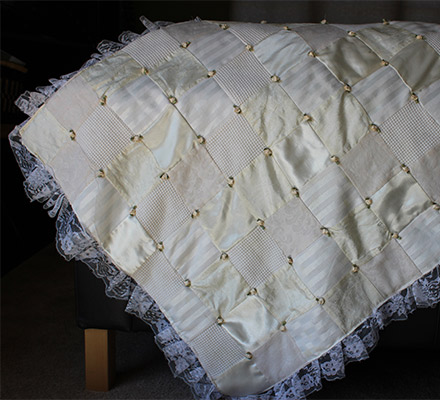
This is a quilt that my sister Sara made for my daughter Sara, when she was born.  It is one of my very favorite things made by one of my very favorite people.  Although the design is simple and the fabrics are monochromatic, she added interest and movement to it by using textured fabrics.

Use-texture

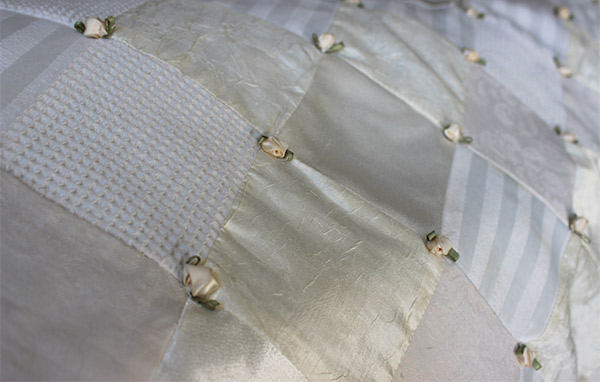
Look at all the different textures she used.  In this closeup shot you can see waffle fabric, two different kinds of damask, crushed silk, linen and satin.  She didn’t stop there, she then added depth by sewing tiny cream rosettes into the corners of each square.  Then she went even further buy adding lace to the edge (see above) to make the perfect quilt for our baby girl.


use-texture-3

The back of the quilt is one large piece of cream satin so it was soft and luxurious and just right for a baby’s sensitive skin.

Ever practical, Sara also made sure that all the these fabrics were washable, as babies are not always clean and tidy.  She knew if I used this quilt it would eventually need to be washed.  I did use it and I washed it again and again.  She chose well because, as you can see, it still looks brand new even though it is 13 years old.

So try using texture in a quilt.  I’d love to hear how it works for you.


Quilting rule #6

IRON TOWARD THE DARK

This is a simple tip but it is an important one.  After sewing a light and dark piece of fabric together, iron your seam toward the dark fabric. This will keep uneven, dark seams from peeking out through the lighter fabric.

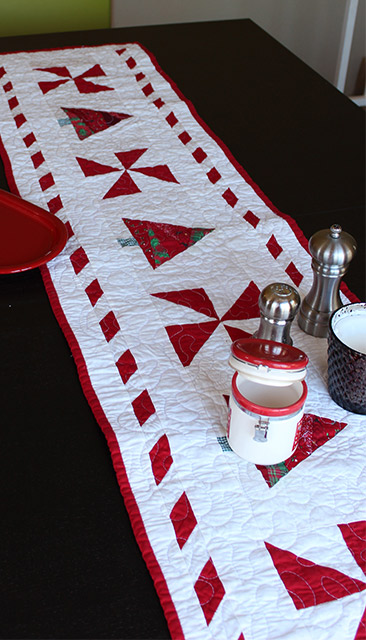
See this cute table runner I made for Christmas a few years ago?

xmas-tablerunner

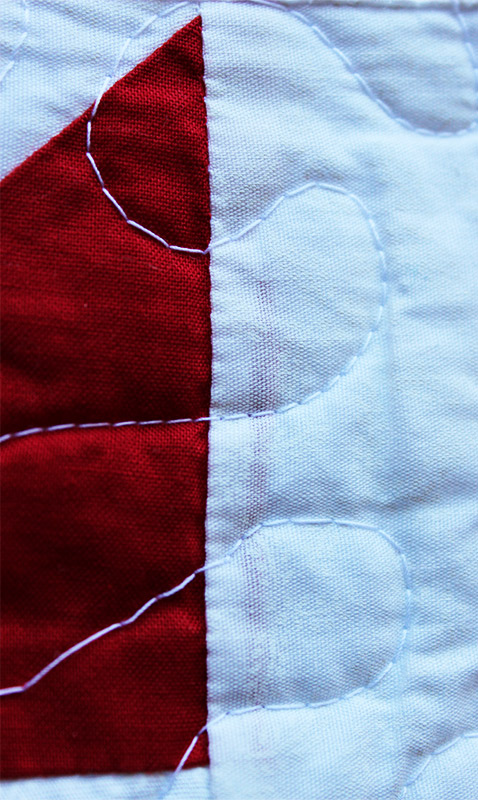
Well if you look closely you can see the red visible through the white fabric in several places on the quilt.  Boooooooo!


Iron-toward-the-dark


You may be thinking, “I’m not going to look at anything that closely.” But trust me, you can see it without being very close at all.  And it’s a bummer every time I notice it.

Iron toward the dark.

Lexy’s Quilt

Lexy-Ward-from-The-Proper-Pinwheel


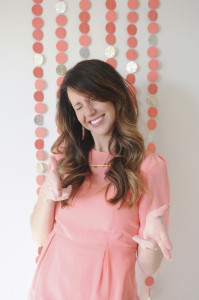
I met Lexy of The Proper Pinwheel a little over a year ago when we worked together for Alt Design Summit.  Lexy  is smart and creative and has such a great sense of humor.

I described her to someone this way, “She has impeccable taste in style and design with a little whimsy and silliness thrown in to surprise you and make you smile.”  I think the picture up there is a perfect example of what I mean.

I was so excited for Lexy when she announced that she and her husband were expecting their first baby.  Is there anything more fun than a new baby?! My answer would be, “No, there is nothing more fun.”

I was planning to make a quilt for Baby Girl Ward already and at the same time I was getting ready to launch Yellow Bug Quilts.   I reached out and asked if she would be willing to be my Guinea Pig and walk through the custom process with me.  She might as well have a say in what she wants right?

Starting from Scratch

Initially Lexy told me a little about what she had in mind for her nursery, and she sent me pictures of the fabrics she wanted to use as well as a picture of a quilt that she liked.  Most of the fabrics were from Sarah Watson’s Indian Summer line.  It captures an outdoorsy feeling with a childlike look that make it perfect for a nursery.

start-to-finish-vert

I went to work on some designs.  We emailed back and forth with different design ideas and played with several elements of the fabric patterns.  I have to say I got a little stuck here.  I couldn’t see how the fabrics were going to work together because I couldn’t be sure about the scale and exact colors.  I finally just went and bought a little bit of each of the fabrics.  All of it made so much more sense to me once I had the fabrics in front of me.

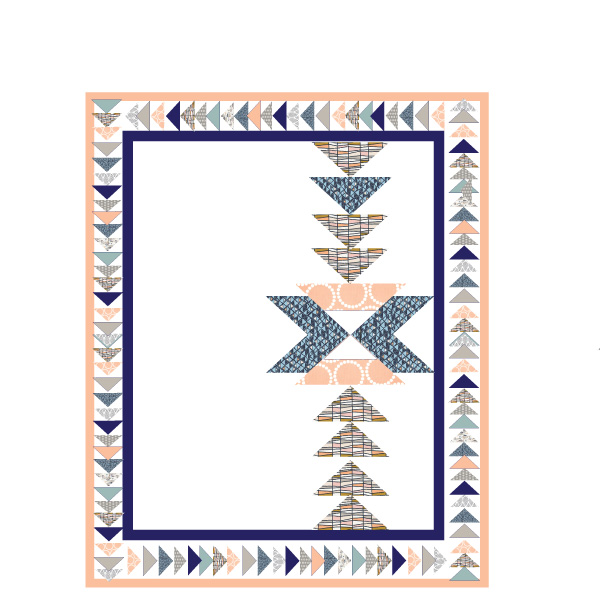
We continued to pass ideas back and forth until we agreed on this design.

lexy's-design-blog


It is always interesting so me to see the collaborative process work and to watch a project evolve from a few fabrics to design ideas and, in this case, on to a finished quilt.

Construction

Once we settled on a design, I started sewing.

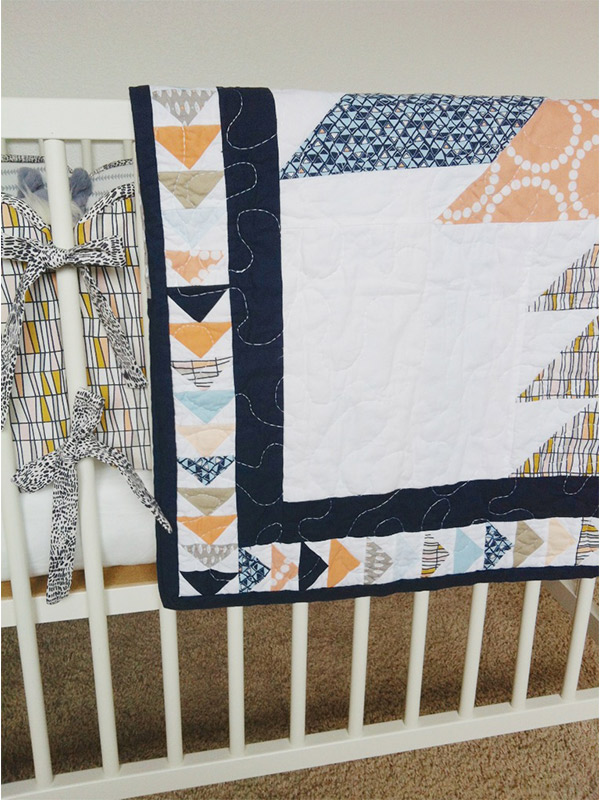
The main design was fairly simple and it came together quickly. The flying geese added the texture and movement to the design and that part was a little more time consuming than the large design but it was absolutely worth the effort.

In fact, once I learned the piecing process, it became relaxing and I spent a lovely day moving from sewing machine to ironing board to cutting table and back to the sewing machine.  Time *ahem* flew by.  I enjoyed myself so much I couldn’t believe it when my daughters got home from school.  I totally wasn’t expecting them for two or three more hours. Ha!

I look forward to making another quilt with lots of flying geese.

My normal MO is to see a quilt I like and reproduce it or at least elements of it. This is the very first quilt I have made/designed from start to finish and I am happy to report that it was a very satisfying endeavor.

I’m so thrilled with how it turned out and how it compliments Lexy’s nursery.  And how cute are those bumper pads??

Lexy's-quilt


What about you? Have you ever designed your own quilt? How did it turn out?

Quilt Rule #4

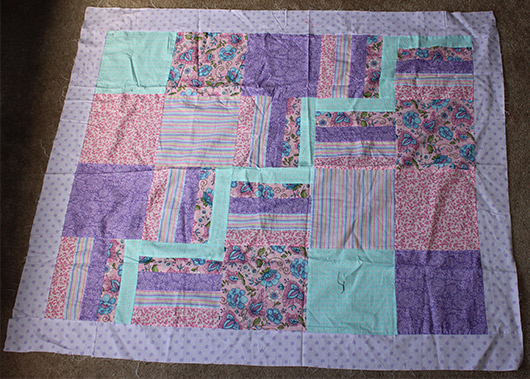
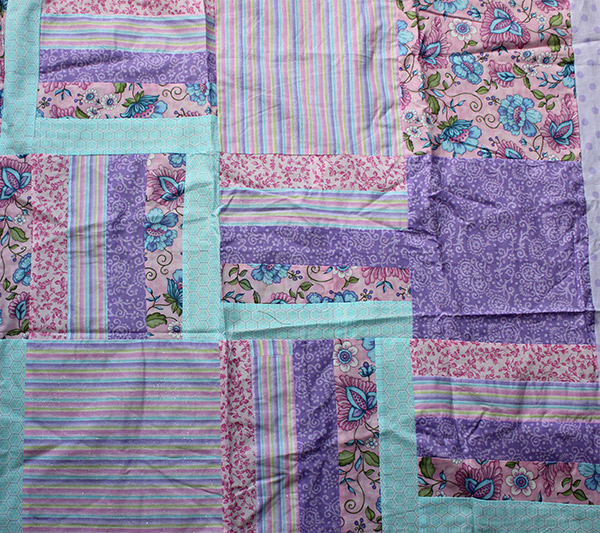
You’re going to make some ugly quilts. I don’t say this to intimidate or discourage anyone but I need to share some tough love with you here. I wish someone had told me that some of my well-thought-out and perfectly-planned efforts were going to turn out some real stinkers, and that it is okay. This quilt for example, it one of my worst.

ugly-quilt

Now before I say anything else I need to say that I really like pastels when I see them.  They are sweet and deliver to my mind thoughts of new babies, springtime and Easter.  Having said that, I rarely purchase them.  I tire of them quickly and don’t have a single shred of pastel in my house or wardrobe. When I was choosing fabrics for this quilt however, I was trying to reach out of my comfort zone and work with fabrics I wasn’t naturally attracted to. Well, you can see that the result wasn’t good.  It is pretty devastating when I come to the realization that whatever I have been working on is terrible and that I have been wasting my time.  Experience has taught me that I learn something new every.single.time I make something. With this quilt, I learned several things:

First, I really don’t like working with pastels.  I tire of them even more quickly than I thought I did.  It got to the point that it was chore to get this stuff out to work on it.  That’s never good.  I learned again that if I don’t like looking at it, chances are, I’m not going to finish it.

Second, there isn’t even the tiniest bit of white space for my eyes to rest.  My eyes just dart around hoping for relief that never comes.  I thought that the striped blocks would add the pattern and the solid blocks would add the stillness.  Yeah, I was wrong.  Ugh! I’m getting a headache just looking at it on the screen.

ugly-closeup

Third, I learned that I needed to stop being afraid of white space and embrace it.   The next 20 quilts I made, I did nothing but experiment with white space.

If I liked the colors of this quilt more I think I would take it apart, add some white space to it and finish it, but instead I think it is on it’s way to Goodwill. I hope it finds its way into the hands of a lovely seamstress/quilter who can’t ever get enough pastels and will make something wonderful from what I started. So my advice when you make an ugly quilt, and you will??  Cut your losses, learn what you can from it and move ahead to the next project.

Friday Tip

Work on more than one project at a time.  

My friend Regina taught me to work on more than one project at a time.  She taught me that as it relates to knitting but it applies to any medium.

If you are like me you were raised to finish one project before starting another so it was a hard habit to break.   It is true that is take a little longer to finish but I’m so much happier.

Sometimes I’m stuck.  Sometimes I’m out of the fabric I need and don’t want to go to the store.  Sometimes I’m just bored.  Sometimes I need a break from a project even when it is something I love.  I love being able to put away a quilt and have some knitting or a small quilt waiting for some attention.

I usually have a quilt or two in the works as well as a knitting project.  Since I changed to this way of thinkingI get more done and am much more creative.

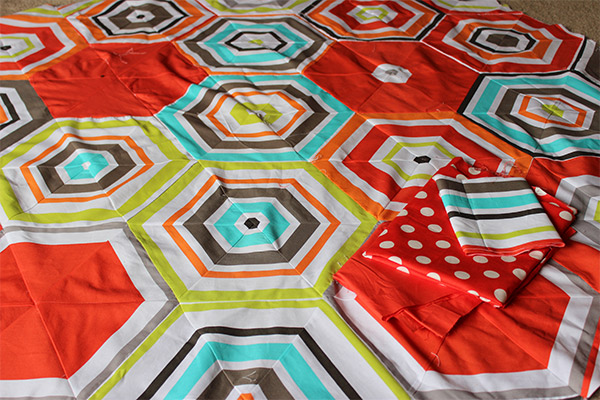
A few months back I was working on this hexagon quilt.  Cutting all the triangles was very time consuming, which I was prepared for, but as I pieced it together  it wasn’t working.  The centers didn’t connect the way they were supposed to, the strips didn’t fit together correctly either.  I was so frustrated!

MM-hexigon-web


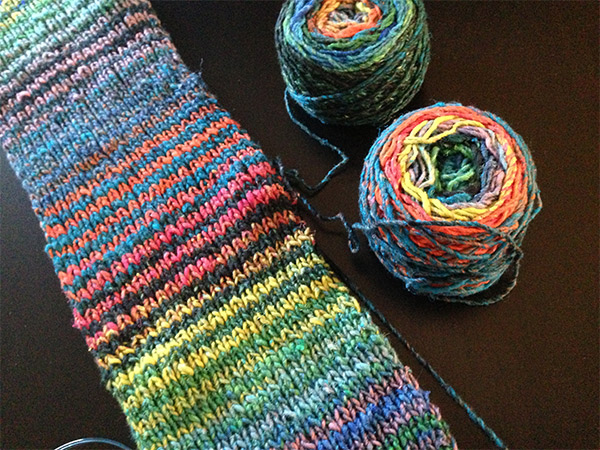
I couldn’t even look at it any more.  I folded it up and sat down with this Noro scarf I’d been knitting.  It was perfect to get the quilt out of my head for a while, until I could face ordering more fabric and starting again.

Noro-scarf

What about you? Do like to finish a project before you start a new one or are you a multi-tasker?

Sara’s quilt

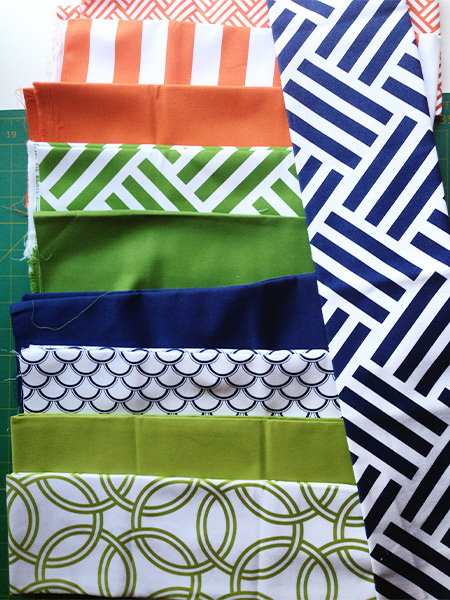
I’m making a couple of quilts for my sister Sara.  She wanted me to use this clean, modern line of fabrics by Michael Miller.  Although they aren’t colors I seek out normally, I love them!  They have been fun to work with. The fabric is a little heavier than I normally use in a baby quilt,it is more like decorator fabric. It softened up beautifully when it was washed, however and if this is a well used quilt, it will be that much more durable.


mm-fabric-bekko


The patterns are large and I wanted to employ them in the best way possible.  I started by planning it with this Six Squares pattern but we wanted to use four different colors and the six squares didn’t allow me to use all the fabrics. So then I designed another quilt using more and smaller squares, using this and this as my inspiration, but no matter how I worked the design the squares were just too small.  So back to the drawing board, literally.  I went back to the Six Squares design and reworked it with eight squares.  It was just right.

I actually ended up making this quilt three times.  I made it in a lap size so I could work out all the bugs.  Then I made it in a baby size but didn’t notice the mistake with the orange square until it was already quilted and bound and I was taking pictures of it.  Ugh!!

sara's-quilt-mistake


I don’t understand it.  I looked at that quilt top for hours while I bound it.  I went over it every inch of it cutting all the tiny threads.  I held it up in a mirror after each block was sewn.  I guess I stopped looking at the design as a whole and just focused on the smaller pieces, until it was too late.

Luckily I cut out two of everything so that I could make a second quilt and Voilà!  Here is the finished product.

sara's-quilt


I’m really proud of it and can’t wait to mail it off.

What I learned?
Look at the pattern as a whole and not just the smaller pieces.

Keep Calm and Get the Seam Ripper

keep-calm-and-get-a-seam-ripper


So, last Monday I sent off the first official quilt from Yellow Bug Quilts.  It was the one I talked about in the last couple of posts.  I forgot to take a picture (ugh!) but it made me happy.  Hopefully, Jean will send me a pic when it is up on her wall.

A couple of things I learned from making that quilt:

  • Color test your reds.  I’m lazy about this because most fabrics are color fast now but the moment I pulled that blanket out of the dryer was not a moment I want to relive.

If something goes wrong, don’t contact the customer (even if it is someone close to you) until you are emotionally under control.  I wrote to  Jean asking her what she wanted me to do, remake the quilt or just send the one that had bled.  That was stupid.  At the time I was still in shock that the quilt was ruined and  could not face the idea that I was going to have to start over.  I wasn’t thinking.  Of course I needed to make a new one!  I should never have put that on her shoulders.  If I had waited one more day to contact her I would never have asked her anything.  I would have just been contacting her to tell her I was remaking the blanket.

  • Doing it right is more important than doing it quickly.  After I finished piecing it the second time. I realized that I had reversed two of the borders.  No one else would have seen this or noticed but I knew that the other way looked better.  I took all the borders apart and put them in the right order.  As I was ripping the seams my daughter said, “Mom, it looks fine the way it is.  It is such a small difference, Jean won’t care.”  I said, “I’ll care and whenever I think of that quilt I will know it isn’t right.”  Jean had to wait a couple extra days for the quilt but I know she’ll be happy with it and so will I.

I have four more quilts in the works but between the first week of school, kids coming home from their summer Europe trip and getting them off to to school in Utah again, the quilting has come to a stand still.  Hopefully I can get going again next week.

Keep A Journal


dear diary 300


Consider keeping a creative journal.

You could include:

  • The date
  • A picture of the quilt
  • A description of your experience
  • A note about what inspired you
  • Anything you learned
  • Note any variations to the pattern you are following
  • The sketch of your own design
  • The fabrics used

This is also a good place to critique yourself. Describe anything you don’t like or might do differently next time.

This takes a little discipline at first but, I promise you will be delighted when you have a record of your work and it is so satisfying to see your progress throughout the years.

Do you keep a journal? Would you add anything to this list?