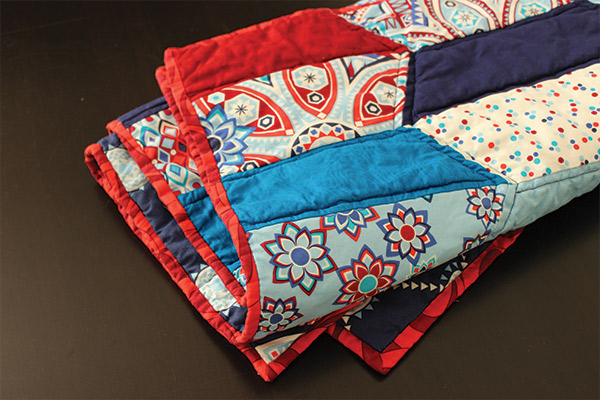
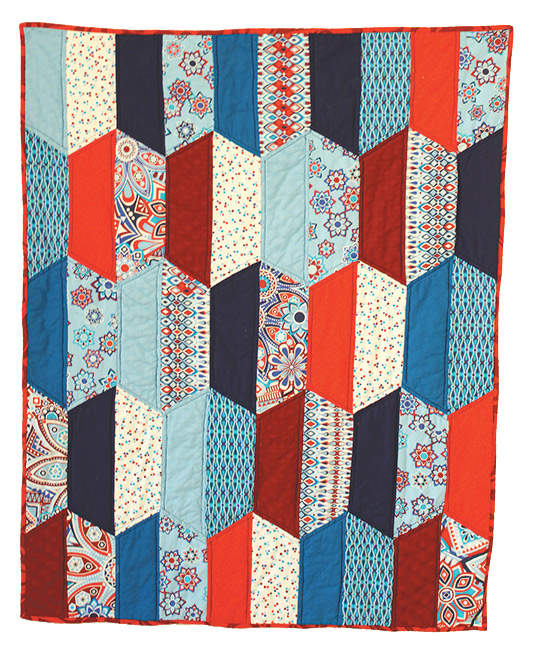
This quilt is 38″ x 50″ and took me approximately 15 hours to make from start to finish. I did it over 3 days, which is how create most of my quilts.
Day one, I cut and arrange.
Day two, I piece the top and baste the quilt sandwich.
Day three, I quilt and bind the quilt.
Tools you will need:
- Circular cutter
- Cutting mat
- Cutting ruler with a 20° mark or a template
- Pins
- Seam ripper
- Iron
Materials you will need:
- 10-14 different fabrics, 1/2 yard each When choosing your fabrics you will want even numbers of prints and solids as well as even numbers of dark and light.
- Fabric for the back, 2 yards
- Fabric for the binding, 1/2 yard
- Batting
Directions:
Begin by cutting your fabric into trapezoids.
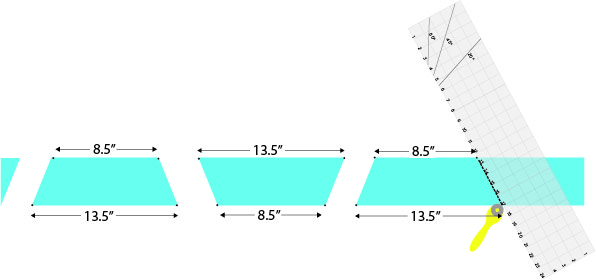
I start by cutting 4.5″ strips and then sewing them together to make one long strip. The length will depend on how you many colors you use. Each trapezoid will be 13.5″ long. Knowing that, if you need three trapezoids of that color, the length will be about 40″ long.
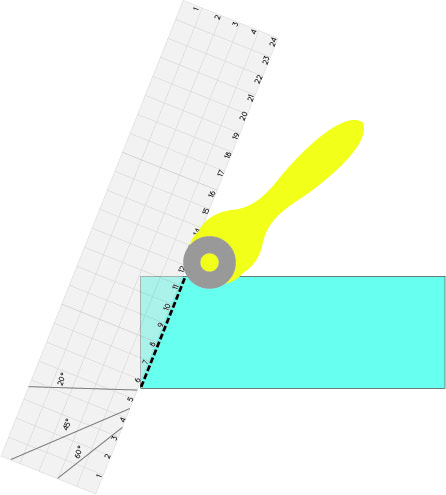
Then using the 20° mark on my ruler, I cut a 20° angle creating the first edge of the first trapezoid.
Then I measure and mark 8.5″ and 13.5″, line up the marks and made another cut.
You may find an easier way to do this step. If you do, you are bound by Quilter’s Law to share it with me. 🙂
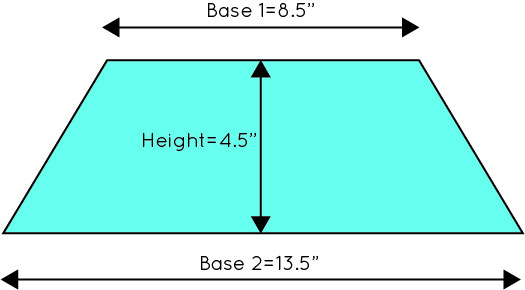
You will need to cut a total of 50 trapezoids. Base 1= 8.5″ Base 2=13.5″ Height =4.5″
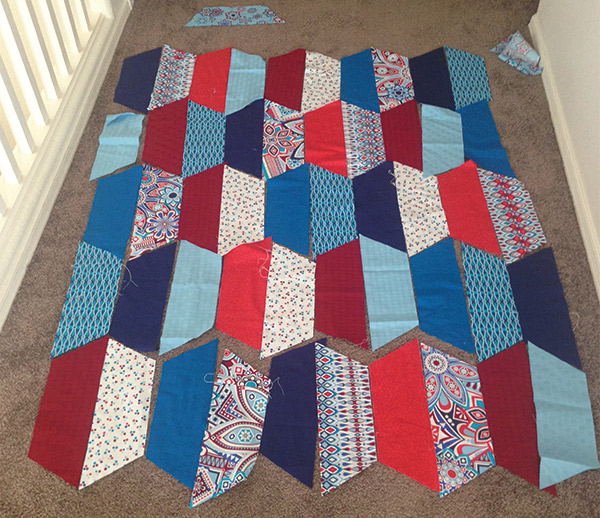
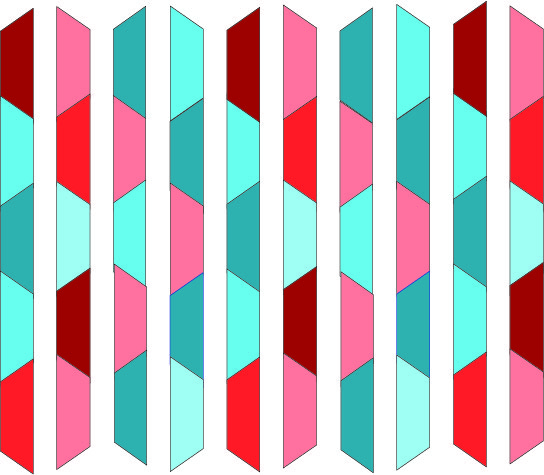
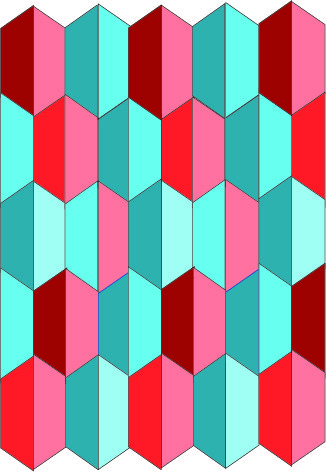
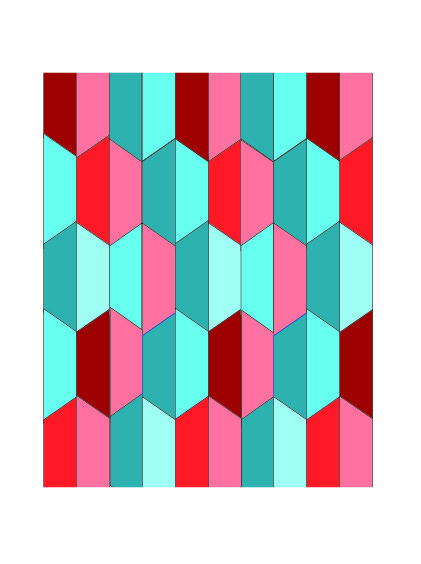
When all your fabric is cut, begin arranging. Five down and ten across.
Tip: If the arraignment isn’t what you imagined, don’t be afraid to change things up. It is hard for me to switch gears when things don’t work out as planned, so I’m saying this mostly to myself.
With this quilt, I planned on doing red solids with red prints and blue solids with blue prints but I ended up with a solid-print-solid-print sequence. Play with it until it looks good to you.
This is what I ended up with and I love it.
*Tip: Take a picture of your arraignment so you have a reference if you need it.
Begin piecing each column. There should be five trapezoids in each column.![]()
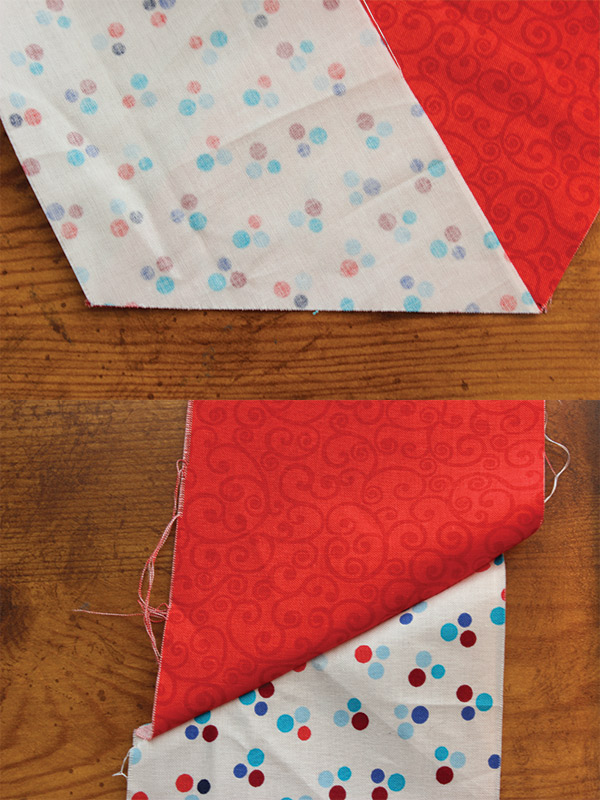
Piecing angles can be tricky at first. If you line up your corners and then sew it together, (as shown below) your edges won’t line up. Booooooo!
You will need to stagger the corners using the 1/4″ scant seam allowance (as shown below) then your edges will look like this. Yea!!!
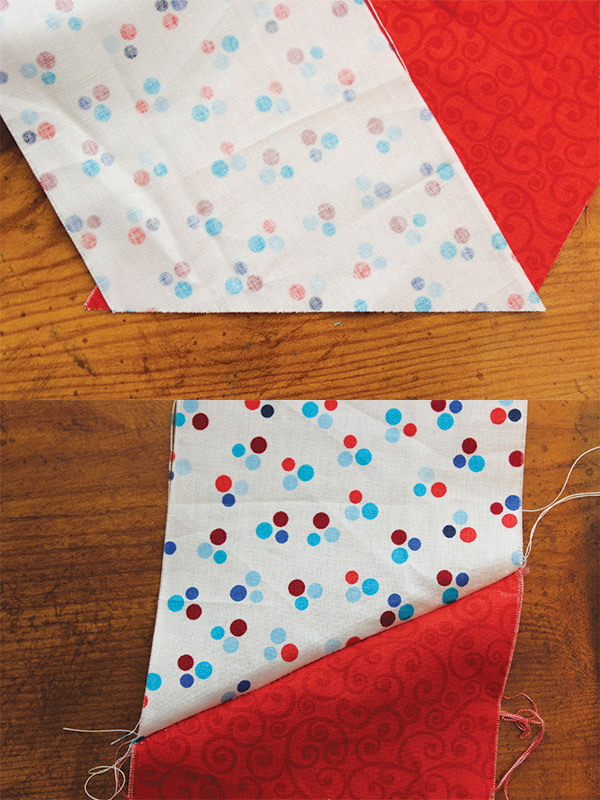
I pin my first five or six pieces to make sure I’m right on but after sewing a few I can usually eyeball it.
Double check the edges after each seam is sewn, to make sure everything is lined up correctly.
Remember to press each seam as you sew.
Repeat until all ten columns are sewn.
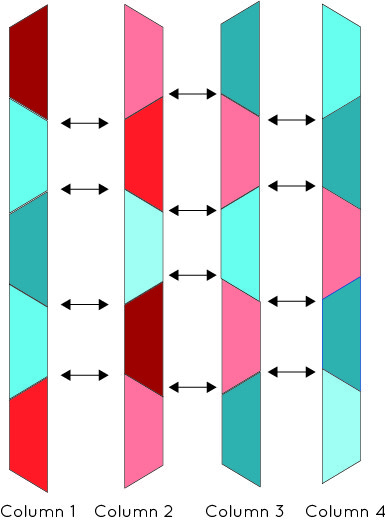
Now we’re going to start sewing the columns together. Pin column one to column two, where each of the seams meet and sew.

Confession: Normally, I go to great lengths not to pin. This is one instance, however, that lots of pinning is worth my time. Pinning will make sure all your seams meet together.
Continue to pin and sew each column until all 10 columns are sewn together.
Press all your seems one more time. This will help to make sure the edges of your quilt are nice and straight.
Square up the edges by cutting off the extra fabric.
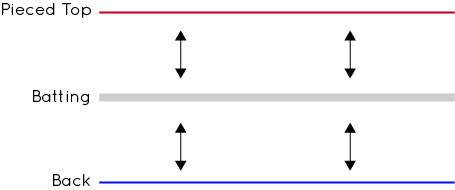
Next, make your quilt sandwich.
Baste your quilt.
Quilt your quilt.
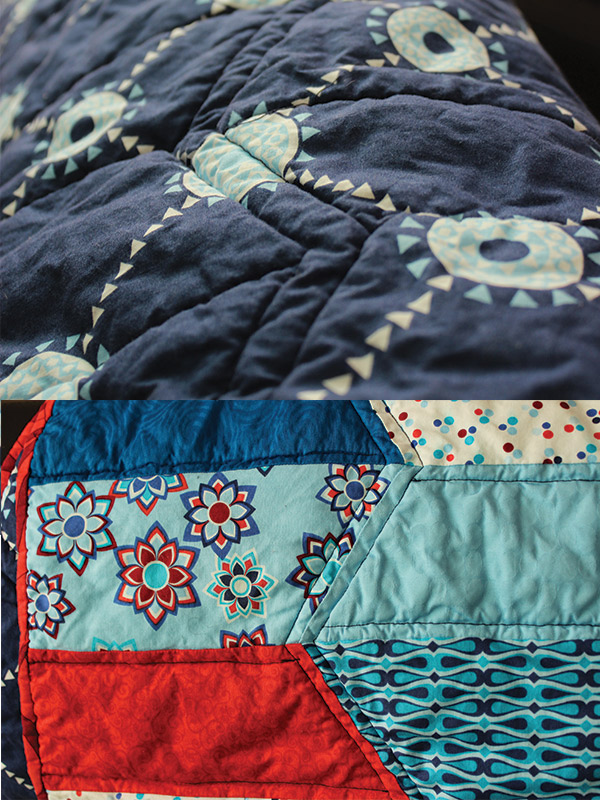
I quilted along the angles to make this chevron design.
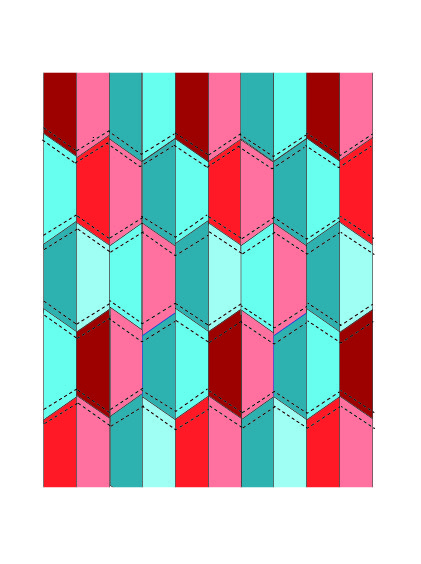 I felt like it needed a little more quilting so I went back and quilted the inside of every other trapezoid. In this case it ended up being all the solid trapezoids.
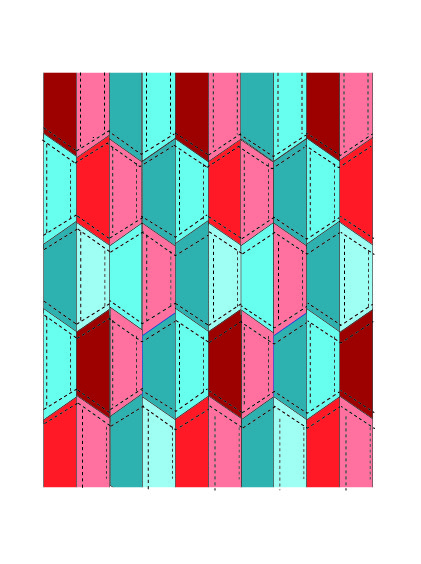
I love how it looks.
Bind your quilt. There are many ways to bind a quilt. If you are new to quilting there are a zillion tutorials out there. I think Allison at Cluck Cluck Sew has a great tutorial for machine binding.
You’re done! This is mine.
I’d love to see your finished quilts! Please send any pictures you’d like to share to [email protected].
